User profile
This user guide will show you how to add and edit information in your user profile.
1. Edit your profile
When logged in to Mauro Data Mapper, your user profile is displayed on the top right of the menu header. Click the white arrow and a dropdown menu will appear. The options available in this menu will depend on whether you are an 'Editor' or an 'Administrator'.
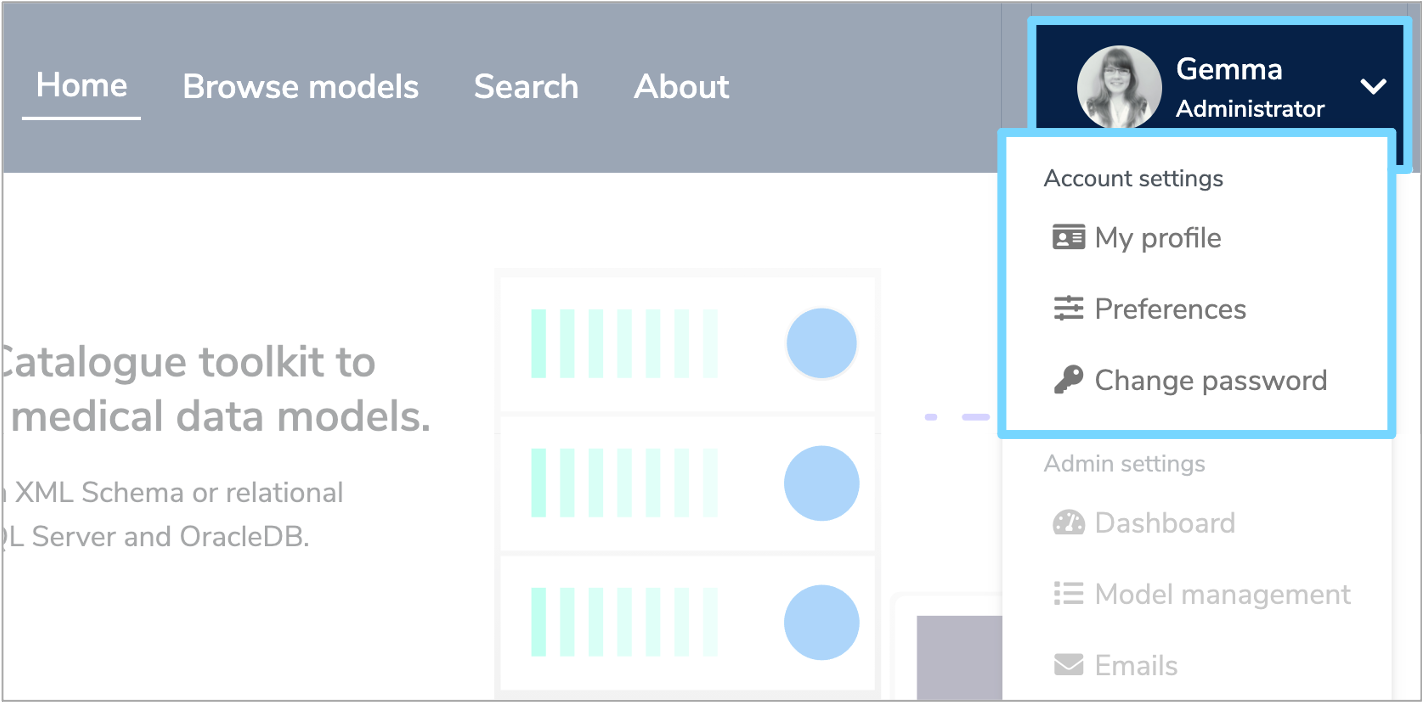
To edit your profile, select the 'My profile' option from the dropdown menu. This will take you to a page displaying your details, with the compulsory fields indicated by a *. These will already be completed according to the information entered when you were registered.
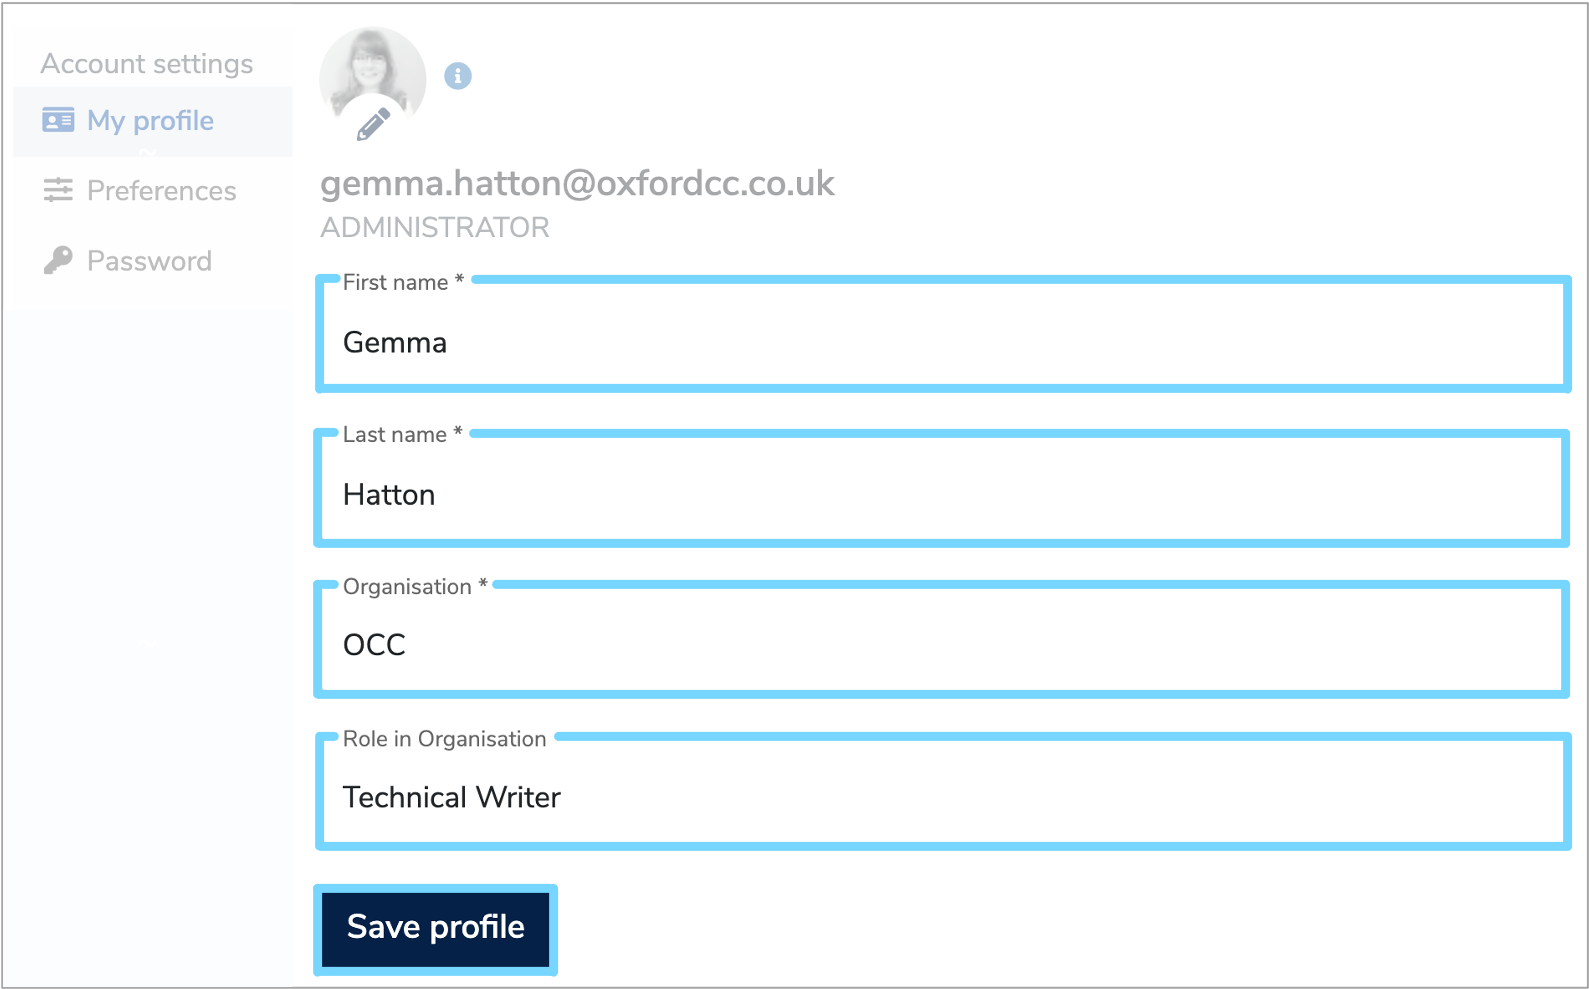
Complete the fields below:
-
First and last name
This is used for identification. -
Organisation
This allows other Mauro Data Mapper users to know which organisation you belong to. -
Role in Organisation
This allows other Mauro Data Mapper users to know your role within your organisation.
Once you have amended your details, click 'Save profile' and your changes will be updated.
2. Change your profile picture
To add or edit an image to your profile picture, navigate to the 'My profile' page and click the pencil icon on your profile picture. A dropdown menu will appear with the option to either 'Change image' or 'Remove image'.
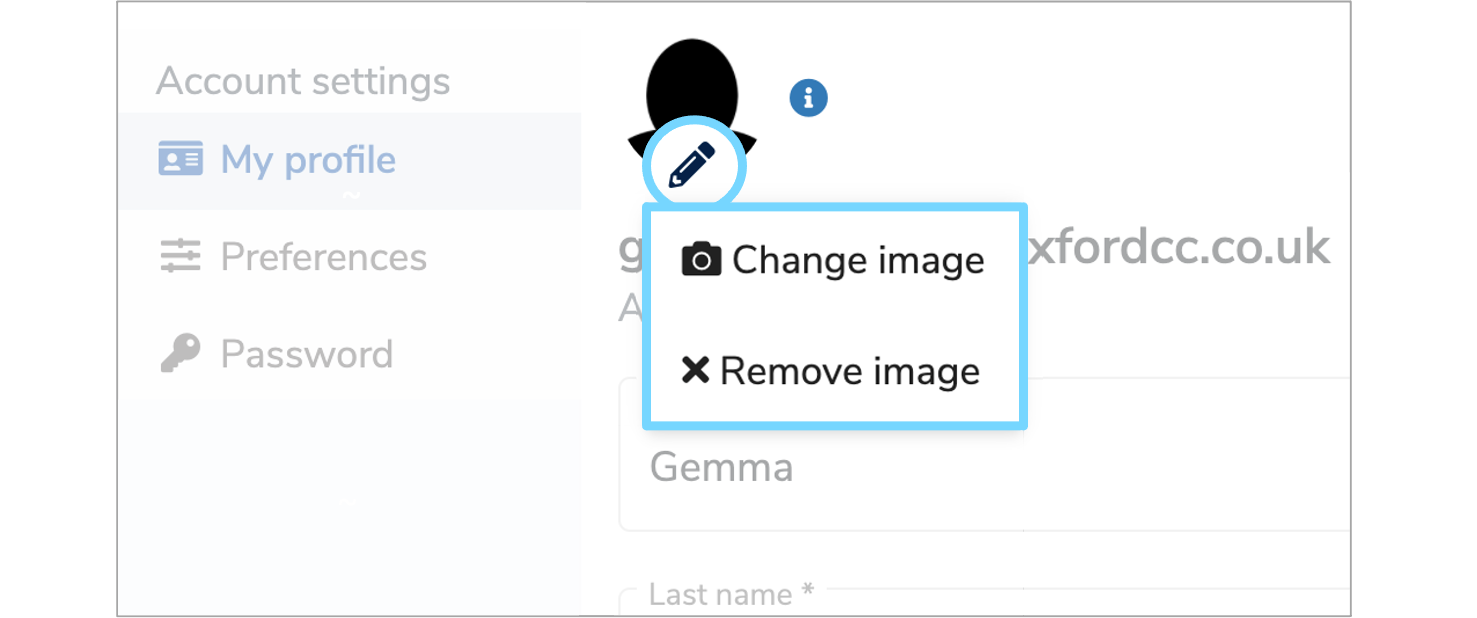
To change the image for your profile picture, select 'Change image' and the file explorer on your computer will open. Navigate to the image you would like to use and then click 'Open'.
This image will then be imported into your 'My profile' page, with a preview displayed on the right. You can then resize the image by hovering over the corners of the highlighted box until an arrow appears. Click and hold the left mouse button and drag the box until it is the desired size.
To drag the entire highlighted box, hover your cursor inside the box until the 4 headed arrow appears. Click and hold the left mouse button until the box is in the desired location.
Once you have finished adjusting your profile picture, click 'Update profile image' and a notification will appear on the bottom right of your screen to confirm the update. Then click 'Save profile' to save all changes.
To remove a profile picture, click the pencil icon and select 'Remove image' from the dropdown menu. Again, a notification will appear at the bottom right of your screen to confirm the change. Then click 'Save profile'.
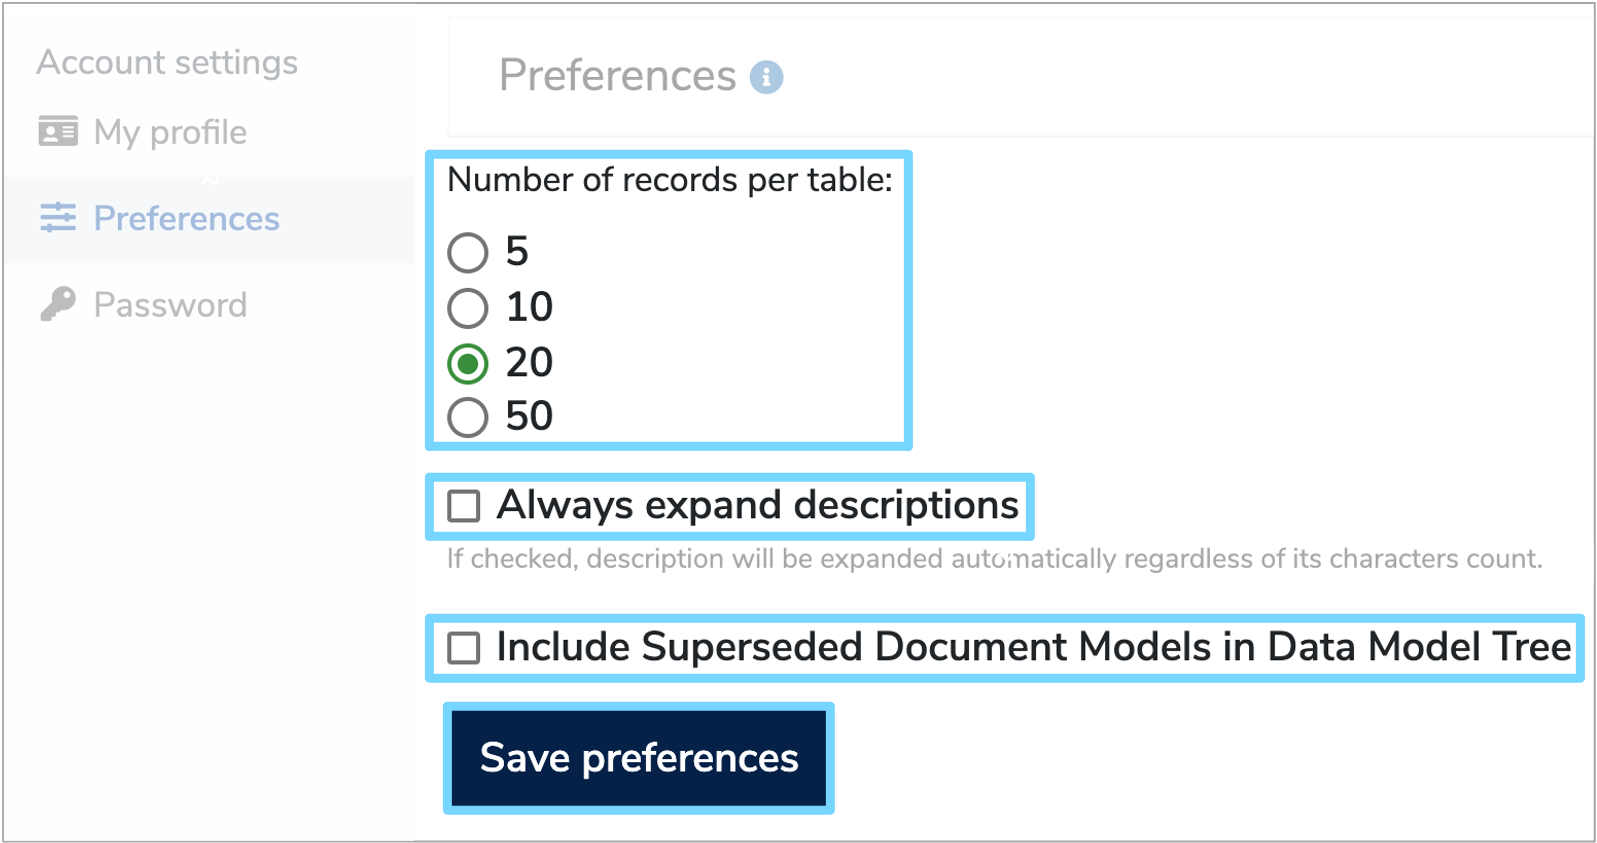
3. Update preferences
You can also specify some interface preferences that are permanently saved to your user profile. To do this, navigate to the 'Preferences' page on your user profile and choose the options that suit you.
-
Number of records per table
By default this is set to 20. However depending on screen size, you may wish to view 5, 10 or 50. Select the option that you prefer. -
Always expand descriptions
The next option allows descriptions to be expanded automatically, regardless of the character count. This is unchecked by default. However, those with larger screens may prefer to always expand descriptions in tables. If so, check this box. -
Include Superseded Document Models in Data Model Tree
The final option determines whether you want the Finder Panel to show superseded document models within the Data Model Tree view. This is unchecked by default as typically these models represent invalid or outdated descriptions. However, feel free to check this box to change this.
Once you have selected all your preferences, click 'Save preferences' and these will now be saved for future sessions.
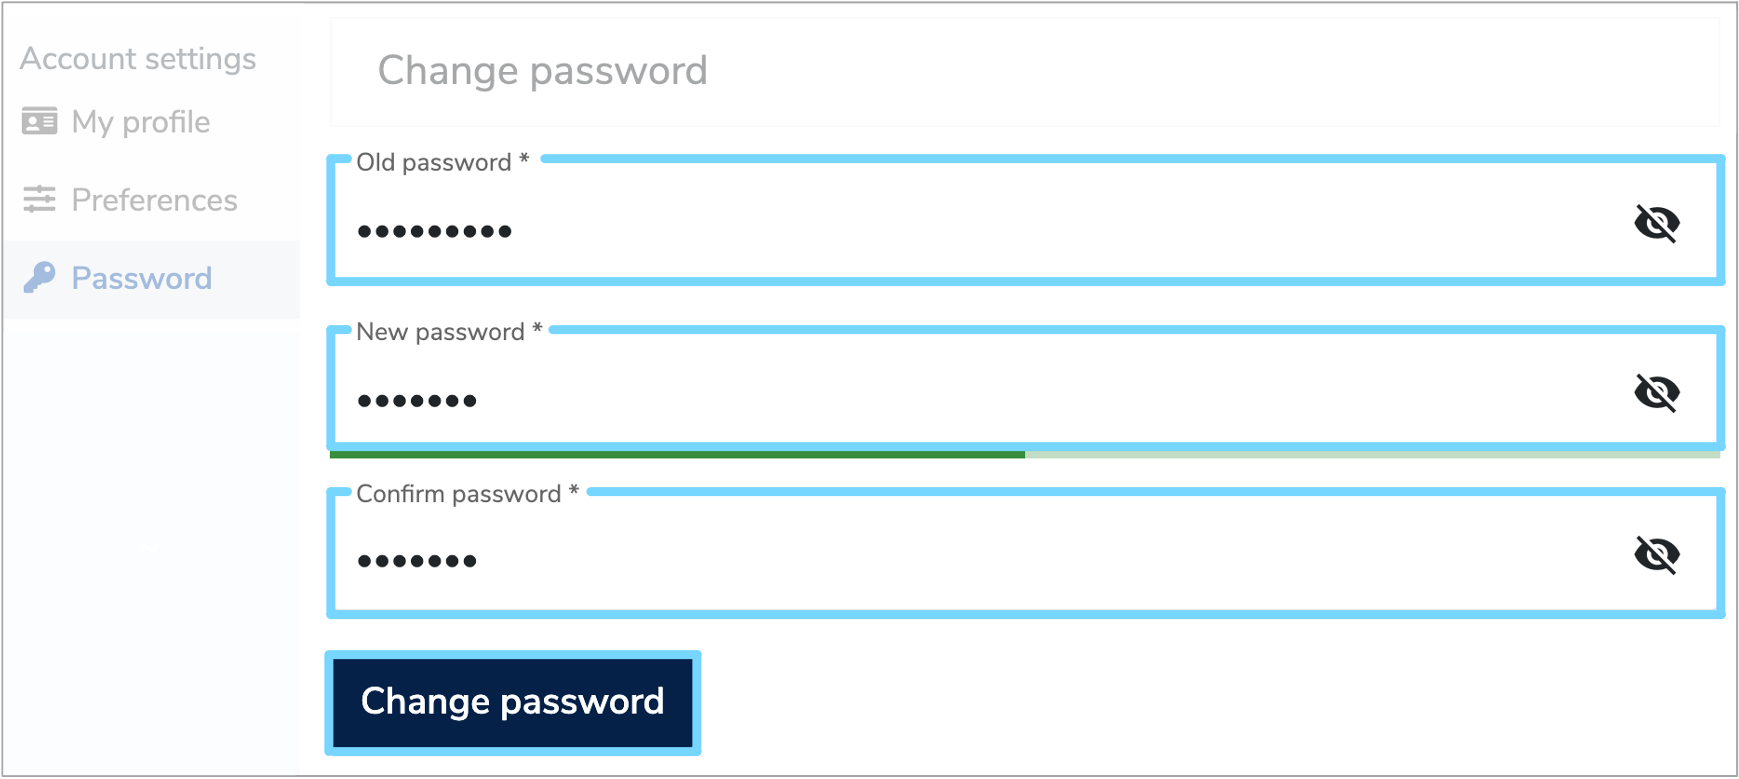
4. Change your password
To change your password, go to the 'Password' page under 'Account settings'. Enter your old password in the first box and your new password in the second box.
The colour bar underneath will automatically change from red to green when you start typing. The width of the green bar will then change according to the strength of your chosen password. You can use both lower and upper case letters as well as special characters and numbers.
If the colour bar changes to dark blue, then the password is too long and won't be accepted. To view or hide your passwords, click the eye icon to the right of each box.
Once you have finalised your password, re-enter it into the 'Confirm password' box and then click 'Change password' to confirm the change.